
 Email Us
 Contact us
 Whats App
Single family home

Thinking about a home energy project can feel exciting. Before anyone starts installing an All-in-One Home Energy Storage System, they should ask if a DIY approach makes sense for them. Safety always comes first when working with energy. People need to assess their energy needs and check whether their home suits this setup. They should know how each part works and why energy safety matters. For many, a professional can help get the best results and keep the energy system running smoothly.
Many homeowners wonder whether a DIY installation of an all-in-one home energy storage system is realistic. Some people enjoy tackling projects themselves, but this one brings unique challenges. The process involves more than just plugging in a few wires. It requires careful planning, technical knowledge, and a strong focus on safety.
A few main technical challenges often come up:
| Challenge | Description |
|---|---|
| Battery Cost | Batteries for energy storage remain expensive, which can affect affordability. |
| Installation Complexity | Setting up these systems is tough and usually needs a licensed electrician. |
| Size of Batteries | Larger batteries for higher energy needs can make installation harder. |
People who want to try diy installation should have solid electrical skills. Some certifications can help, such as NABCEP ESIP Certification, UL Standards Training, or Battery Management System Certification. These programs teach safety, compliance, and hands-on skills for handling energy storage systems. Without this background, mistakes can lead to safety hazards or system failures.
Professional installation offers peace of mind. Many choose this route because it ensures the system meets safety standards and works as intended. Professionals know how to handle complex wiring, grounding, and integration with solar panels or backup power. They also understand local codes and can help avoid costly errors.
Here’s a quick look at cost differences:
| Installation Type | Cost per Watt | Total Cost for 6kW System |
|---|---|---|
| Professional | $2.50-$4.00 | $15,000-$24,000 |
| DIY | $1.50-$2.50 | $9,000-$15,000 |
Professional installation costs more because of the complexity and the need to follow strict safety rules. Still, many find the extra expense worthwhile for a reliable energy setup.
Legal requirements play a big role in any energy storage installation. Homeowners must submit detailed plans to local authorities, install the system according to approved plans, and pass inspections. Certification is crucial for safety and insurance. Without the right paperwork, insurance companies may not cover the system, and local officials might not approve it.
●Homeowners need an ESS certificate for legal compliance and insurance.
●Installers must have certifications like NABCEP ESIP.
●Required certifications include UL 9540, UL 9540A, UL 1973, UL 1741, NFPA 855, and DNV.
Diy installation appeals to some, but most people find that professional installation offers better protection, safety, and long-term value for their home energy system.
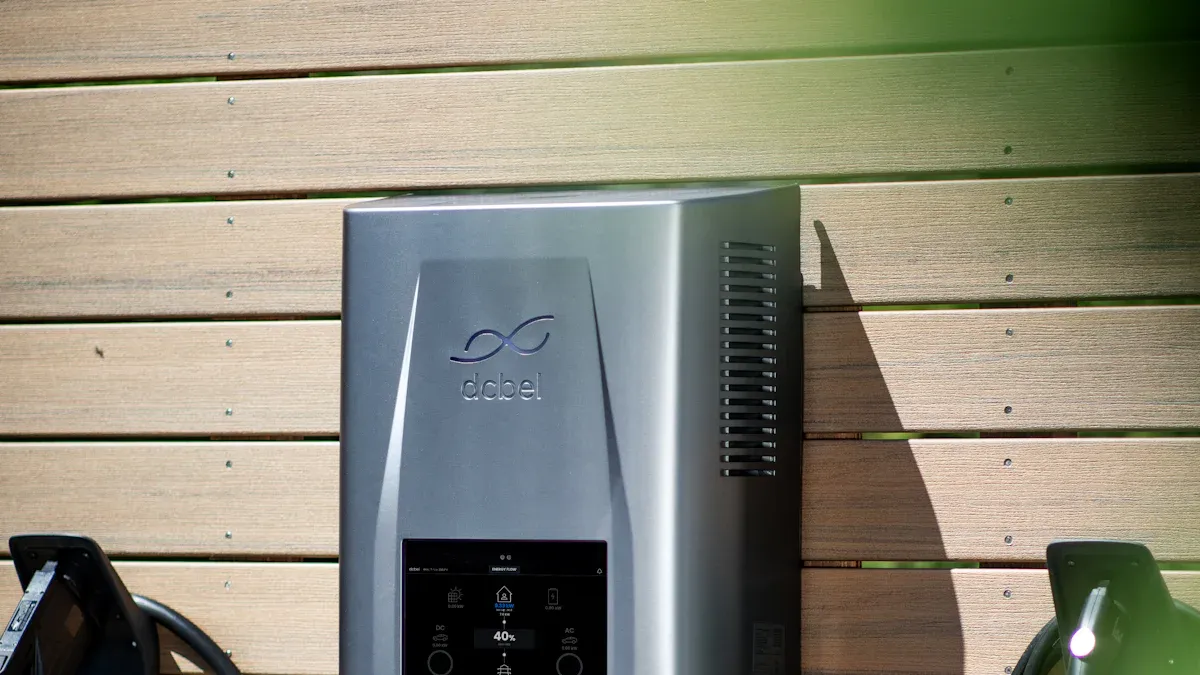
A modern all-in-one home energy storage system brings together several important parts. Each one plays a unique role in keeping the lights on and the power flowing. Here’s what people will find inside most home battery storage systems:
●High-capacity battery packs
●Built-in solar inverter
●Intelligent energy management system
●Optional grid connection
The battery sits at the heart of every all-in-one energy storage system. Most home battery storage systems use lithium-ion battery packs. These batteries store extra energy from solar panels or the grid. When the sun goes down or the power goes out, the battery steps in. The battery management system, or BMS, keeps the battery safe. It checks the battery’s voltage, temperature, and health. This system helps the battery last longer and work better.
The inverter acts as the translator in an all-in-one home energy storage system. Solar panels and batteries use direct current (DC) electricity. Homes use alternating current (AC) power. The inverter changes DC into AC so appliances can use it. Many all-in-one energy storage system units have a hybrid inverter. This device manages power from both the solar panels and the battery. It also tracks how much energy the solar panels make and adjusts the battery charging.
Solar panels connect directly to the all-in-one home energy storage system. The panels send DC power to the battery for storage. The inverter then changes this power into AC for the home. The system can also send extra energy back to the grid if allowed. This setup makes home battery storage systems flexible and efficient.
The control unit acts like the brain of the all-in-one energy storage system. It manages how the battery, inverter, and solar panels work together. The control unit decides when to charge the battery, when to use stored energy, and when to send power to the grid. It also lets users check their home battery status and energy use through a display or app.
An all-in-one home energy storage system makes energy management simple. The solar panels collect sunlight and turn it into DC electricity. The battery stores this energy for later. The inverter changes the stored DC into AC for the home. The control unit keeps everything running smoothly.
Here’s how the main parts connect:
1. The solar panels send DC power to the battery for storage.
2 . The hybrid inverter manages the flow between the solar panels, battery, and home.
3.The battery management system keeps the battery safe and efficient.
4. The control unit decides when to use stored energy or send it to the grid.
This setup means the home battery can power the house at night or during outages. The all-in-one energy storage system also helps lower energy bills by using stored solar power. Home battery storage systems give homeowners more control over their energy use and peace of mind during blackouts.
Before anyone installs an all-in-one energy storage system, they need to figure out how much energy their home uses. This step helps avoid buying a system that is too small or too large. People often want to know how to size their system for the best results and cost savings. Here’s a simple process to follow:
1. Evaluate daily energy usage in kilowatt-hours (kWh). Look at past utility bills to see how much energy the home uses each day. Think about future changes, like adding an electric vehicle or new appliances.
2 . Decide on the battery’s purpose. Some want backup power for outages, while others want daily self-consumption or whole-home coverage. A thall-in-one energy storage system should match these needs.
3. Review key specifications. Check the usable capacity, cycle life, and efficiency of the all-in-one energy storage system. Make sure it has the right safety certifications and can expand if energy needs grow.
Choosing the right size helps control costs and ensures the all-in-one energy storage system delivers enough energy when needed.
Finding the best spot for an all-in-one energy storage system matters. The right location keeps the system safe and makes maintenance easier. People should look at sunlight exposure and accessibility before making a decision.
If the all-in-one energy storage system connects to solar panels, sunlight exposure becomes important. The system should sit close to the solar array to reduce energy loss. A sunny spot helps the system charge faster and work more efficiently.
Easy access makes installation and future maintenance simpler. The area should have enough space for the all-in-one energy storage system and allow for airflow. Here’s a quick look at what to consider:
| Factor | Description |
|---|---|
| Suitable Environment | Choose a dry, well-ventilated area with temperatures between 0°C and 40°C, away from fire hazards and water. |
| Adequate Space | Pick locations like garages or balconies with enough load-bearing capacity and space for maintenance. |
| Load-Bearing & Protection | Make sure the surface supports the weight. Outdoor setups need rainproofing and impact protection. |
A good site keeps the all-in-one energy storage system running smoothly and helps avoid extra costs from damage or repairs.
Every homeowner must follow local rules before installing an all-in-one energy storage system. Permits and codes protect people and property. Skipping this step can lead to fines or insurance problems. Here are the basics:
●A permit is usually required for home battery installations to meet local building codes.
●The Authority Having Jurisdiction (AHJ) reviews and approves the all-in-one energy storage system plans.
●Homeowners need to provide a site plan, electrical diagram, and equipment specification sheets.
Following these steps ensures the all-in-one energy storage system meets safety standards and works as intended. It also helps avoid hidden costs and keeps warranties valid.
Getting ready to install an all-in-one energy storage system means gathering the right tools and materials. The right setup makes the job smoother and safer. Every installer should check their toolkit before starting. This section covers the essentials for a successful project.
Hand tools play a big role in any installation. Installers often reach for screwdrivers, pliers, and wire strippers. These tools help with connecting wires and securing parts. A tape measure ensures accurate placement. Wrenches and socket sets tighten bolts and brackets. A utility knife comes in handy for opening boxes and trimming insulation.
Power tools speed up the process. A cordless drill makes mounting the all-in-one energy storage system easier. Many installers use a hammer drill for concrete walls. An impact driver helps with heavy-duty screws. Always keep extra drill bits and batteries nearby. These tools save time and reduce effort.
Safety should always come first. Working with an all-in-one energy storage system involves high voltage and heavy equipment. Every installer needs insulated gloves to protect against electric shock. Safety glasses shield eyes from dust and debris. A hard hat guards against bumps and falling objects. Closed-toe shoes with non-slip soles prevent slips and injuries. Some people add a fire extinguisher nearby for extra peace of mind.
Many homeowners choose a DIY kit for their all-in-one energy storage system. These kits include most of the parts needed for installation. Choosing the right kit makes a big difference. Some features matter more than others. The table below highlights what to look for:
| Feature | Description |
|---|---|
| Battery Types | Different types of batteries (lithium-ion, lead-acid) offer unique performance and lifespan. |
| System Integration | The system must work with existing electrical setups and solar panels. |
| Scalability | Modular systems allow for future expansion as energy needs change. |
| Professional Installation | High-voltage systems may require certified installers for safety and compliance. |
| Long-Term Value | Consider total ownership costs and potential savings from energy management strategies. |
Accessories also help with installation. Mounting brackets, cable ties, and conduit keep the all-in-one energy storage system secure and organised. Some kits include monitoring devices for tracking energy use. Others offer smart apps for remote control. These extras make the all-in-one energy storage system easier to manage and maintain.
A well-prepared installer checks every item before starting. The right tools, safety gear, and accessories set the stage for a smooth, all-in-one energy storage system installation. With careful planning, anyone can create a reliable energy solution for their home.
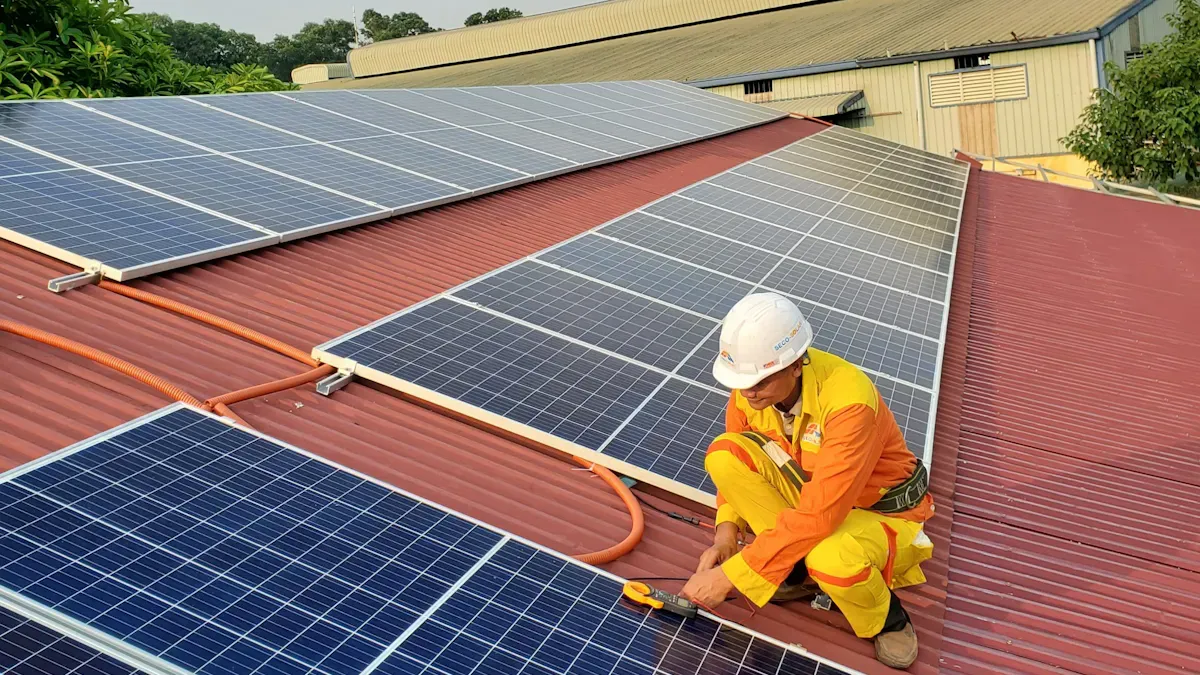
Every installation starts with unpacking the all-in-one energy storage system. They should open the packaging carefully and check for any visible damage. Scratches, dents, or broken parts can affect performance and safety. If anything looks wrong, they should contact the supplier before moving forward.
Next, they should lay out all the components. Most all-in-one energy storage system kits include the main unit, mounting brackets, cables, and a user manual. It helps to use a checklist to confirm that nothing is missing. Missing parts can delay the installation process and cause frustration.
Mounting the all-in-one energy storage system is a key part of the installation. The right location and secure mounting keep the system safe and stable. People often choose a garage, basement, or utility room for this step.
Installers must decide between wall or floor mounting based on the system’s size and weight. Wall mounting works well for lighter units, while heavier systems need a strong floor base. Here are some best practices for mounting:
●Place the all-in-one energy storage system in a cool, dry, and well-ventilated area.
●Keep the battery away from direct sunlight and extreme temperatures.
●Make sure there is enough airflow to help with heat dissipation.
●Protect the unit from bumps, water, and other physical hazards.
●Leave enough space around the system for easy maintenance and inspections.
●Always follow the National Electrical Code and local rules for safe installation.
A sturdy mount prevents accidents and keeps the all-in-one energy storage system running smoothly. Installers should use the provided brackets and hardware. They should double-check that the wall or floor can support the weight. For outdoor setups, extra protection against rain and impact is important.
Wiring the all-in-one energy storage system takes patience and attention to detail. This step connects the battery, inverter, and other parts to the home’s electrical system. Mistakes here can cause safety risks or poor performance.
Installers start by planning the layout. They arrange the batteries and the inverter to minimise cable runs and make terminals easy to reach. Using the right wire gauge is critical. Undersized wires can overheat and create hazards. The installer should use wire strippers, a crimper, a torque wrench, and a multimeter for this job.
The next step is making secure connections. Tight connections prevent energy loss and reduce fire risk. Installers use a quality crimper and torque wrench to fasten cables. They follow this order for safety:
●Connect the battery positive terminal to a fuse or circuit breaker.
●Attach a master disconnect switch.
●Link the inverter or loads.
Protection devices like fuses and breakers guard against overcurrent. The installer should never skip these parts. After wiring, they use a multimeter to check voltage and polarity at each connection point.
Proper grounding is essential for every all-in-one energy storage system. Grounding protects people and equipment from electrical faults. The installer connects the system’s ground terminal to the home’s main ground rod or grounding bar. They use the correct wire size and tight connections.
Inadequate grounding increases the risk of electric shock and system failure. The installer should always follow manufacturer instructions and local codes. They should never mix battery types or ignore spacing and ventilation. These steps keep the all-in-one energy storage system safe and reliable.
Bringing all the parts together is where the all-in-one energy storage system starts to shine. This step connects the solar panels, backup power, and monitoring features. Each part must work together for the system to deliver reliable energy and backup power when needed.
Solar panels play a big role in the all-in-one energy storage system. They capture sunlight and turn it into electricity. The system stores extra energy in the battery pack for later use. This setup changes how a home uses energy. Instead of only using solar power during the day, the system lets homeowners use stored energy at night or during outages.
Here’s a quick look at how the main components work together:
| Component | Function |
|---|---|
| Solar Panels | Convert sunlight into electricity, which is stored in the battery pack. |
| Battery Pack | Stores the generated electricity for use when needed. |
| Inverter | Converts DC power from the battery into AC power for home use. |
| Charge Controller | Optimises charging, prevents overcharging, and boosts solar efficiency. |
To connect the solar panels, installers follow these steps:
●Mount the solar panels in a sunny spot, usually on the roof.
●Run the DC cables from the panels to the all-in-one energy storage system.
●Connect the cables to the charge controller and inverter as shown in the manual.
●Double-check all connections for tightness and correct polarity.
This integration gives homeowners more energy independence. They can use their own solar power, reduce their utility bills, and keep the lights on during outages. The all-in-one energy storage system also helps manage loads, so high-demand devices run mostly on stored energy.
Setting up backup power is a key part of the installation. The all-in-one energy storage system can keep essential appliances running when the grid goes down. Here’s how installers usually set up backup power:
1. Assess the site to find the best spot for the system.
2 . Review the home’s energy use to size the system correctly.
3.Get the needed permits and utility approvals.
4. Install the inverter to handle the switch from grid to battery power.
5. Mount the battery on a wall or floor, following safety guidelines.
6 . Connect the battery to the home’s electrical system.
7.Test the system to make sure backup power works as planned.
Installers often use a critical loads panel. This panel powers only the most important circuits, like the fridge, lights, and Wi-Fi. By focusing on these, the all-in-one energy storage system can provide backup power for longer periods.
Monitoring helps homeowners get the most from their all-in-one energy storage system. A good monitoring setup tracks solar production, battery activity, and energy use in real time. Most systems offer an app or a web portal for easy access.
Installers usually follow these steps for monitoring:
●Connect the inverter to the internet using Wi-Fi, Ethernet, or cellular networks.
●Set up the monitoring app or portal on a phone or computer.
●Make sure the inverter recognises the battery bank and its capacity.
●Set preferences for how the system uses battery power during outages.
●Use the app to track amp-hours, state of charge, and overall system health.
Some systems include dedicated battery monitors for more detailed data. Others combine everything in one dashboard. Monitoring helps spot problems early and lets homeowners adjust settings for better performance.
A complete system integration brings together solar, battery, backup power, and monitoring. When each part works together, the all-in-one energy storage system delivers reliable energy, peace of mind, and real savings.
Before anyone powers up a new home energy storage system, they should take time for a few important checks. These steps help prevent problems and keep the system running safely. People often start by looking for any physical damage. Dents, cracks, or leaks can signal trouble. The area around the system should stay clean and free from dust or flammable materials. Good ventilation matters, too. It helps prevent overheating and keeps the system working well. Many users also check the system’s monitoring software for alerts or performance issues. These early checks set the stage for a smooth installation and reliable energy use.
●Inspect for dents, cracks, or leaks.
●Make sure the area is clean and clear of flammable items.
●Check that the system has proper ventilation.
●Review the monitoring software for any alerts.
After passing the initial checks, the next step is to power up the system. Following the right order keeps the process safe and helps avoid mistakes. Here’s a simple table that shows the recommended sequence for most all-in-one home energy storage systems:
| Step | Action |
|---|---|
| 1 | Turn Batteries on |
| 2 | Wait 1 min to ensure Master has M/S LED on |
| 3 | Turn on Disconnect, and then the inverter |
Each step gives the system time to adjust and helps prevent sudden surges. Turning on the batteries first allows the system to wake up. Waiting a minute lets the master controller show its status. Only then should someone turn on the disconnect and inverter. This careful approach protects the energy system and keeps everyone safe.
Once the system is running, regular monitoring helps keep energy flowing smoothly. People should check battery performance by watching voltage, current, and the state of charge. Tracking energy usage patterns can help them decide when to use stored energy, especially during peak hours. Regular inspections and maintenance keep the battery and other parts in top shape. Many systems offer apps or dashboards for easy tracking. Staying alert to changes or warnings helps catch small issues before they become big problems.
●Monitor battery voltage, current, and state of charge.
●Track energy usage to optimise savings.
●Inspect and maintain the system regularly.
Safety always comes first when working with a home energy storage system. People can enjoy the benefits of clean energy, but they need to stay alert to risks during and after installation. A few simple habits can help keep everyone safe and protect the investment.
Here are some important safety tips for anyone handling an energy storage system:
●Hire certified installers for the initial setup. They know how to handle high-voltage equipment and follow local codes.
●Store batteries in a cool, dry, and well-ventilated area. This reduces fire risks and helps the system last longer.
●Keep the system away from direct sunlight, water, and flammable materials. These hazards can damage the battery or cause dangerous situations.
●Make sure the installation site has enough space and a strong, load-bearing surface. Garages and balconies often work well.
●Place a fire extinguisher nearby. It’s a simple step that adds peace of mind in case of emergencies.
●Use remote monitoring tools to catch problems early. Many systems send alerts if something goes wrong.
●Check the system regularly for signs of damage, overheating, or loose connections. Look for dents, cracks, swelling, or leaks on the battery and inverter.
●Inspect terminals for corrosion. If anything looks off, call a qualified installer right away.
Some warning signs show that a professional should step in:
●Sudden loss of energy production, especially on sunny days.
●Strange buzzing, humming, or overheating smells.
●Breakers or GFCI outlets that trip more than once.
●Swelling, leaking, or corroded batteries.
●The system no longer holds energy as expected.
●The energy system fails to supply power during an outage.
If any of these problems appear, it’s best to disconnect the system safely and contact a technician. Trying to fix complex energy issues without the right training can make things worse.
Regular visual checks and smart monitoring help catch small problems before they grow. People who follow these safety steps can enjoy reliable energy and peace of mind for years to come.
Careful planning and safe installation help homeowners get the most from their energy system. They should always match system size to their energy needs and follow safety rules. Regular checks keep energy flowing and support long-term energy independence. Before starting, they can ask themselves if they feel ready for the work or if a professional might help. For more guidance, groups like the Sustainable Energy Action Committee and the EPA offer tips on energy storage, safety, and building codes. With the right steps, anyone can enjoy reliable energy and greater independence at home.


Compact, quiet, and powerful, it keeps your essentials running during outages and lets you charge anywhere with solar power or grid power.
Perfect for renters who need flexibility without compromise.
Our estimator is only set up to provide preliminary estimates and installer information to residents of single family homes.